

Transforming your bathroom into a calming, nature-inspired retreat can be as simple as incorporating elements of greenery. One unique and stylish way to bring the outdoors in is by creating a self-adhesive moss panel for your bathroom mirror. Not only does it add a fresh, organic touch, but the lush, textured appearance of moss also complements the clean, reflective surface of a mirror. In this step-by-step guide, I’ll walk you through the process of crafting a self-adhesive moss panel that will effortlessly elevate the look of your bathroom while requiring minimal effort. Let’s dive into the creative process and explore how you can enhance your bathroom with this eco-friendly DIY project!
Step 1: Measure Your Space and Choose Your Mirror
Before you begin, it’s important to assess the area where you want to add your moss panel. Measure the space around your bathroom mirror to ensure you choose the right size for your design. You can either work with an existing mirror or select a new one that fits your vision. Take note of the dimensions, as this will guide you in selecting the appropriate size of the self-adhesive moss panel later in the process. Having a clear idea of the space will ensure that your moss panel complements the mirror perfectly.
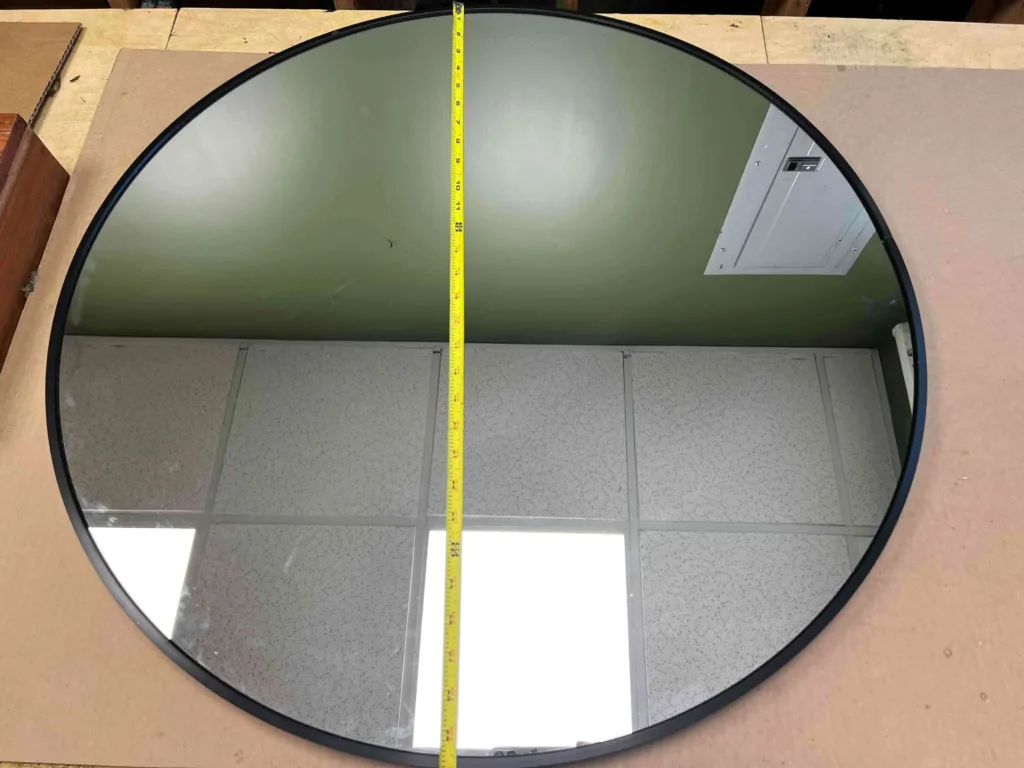
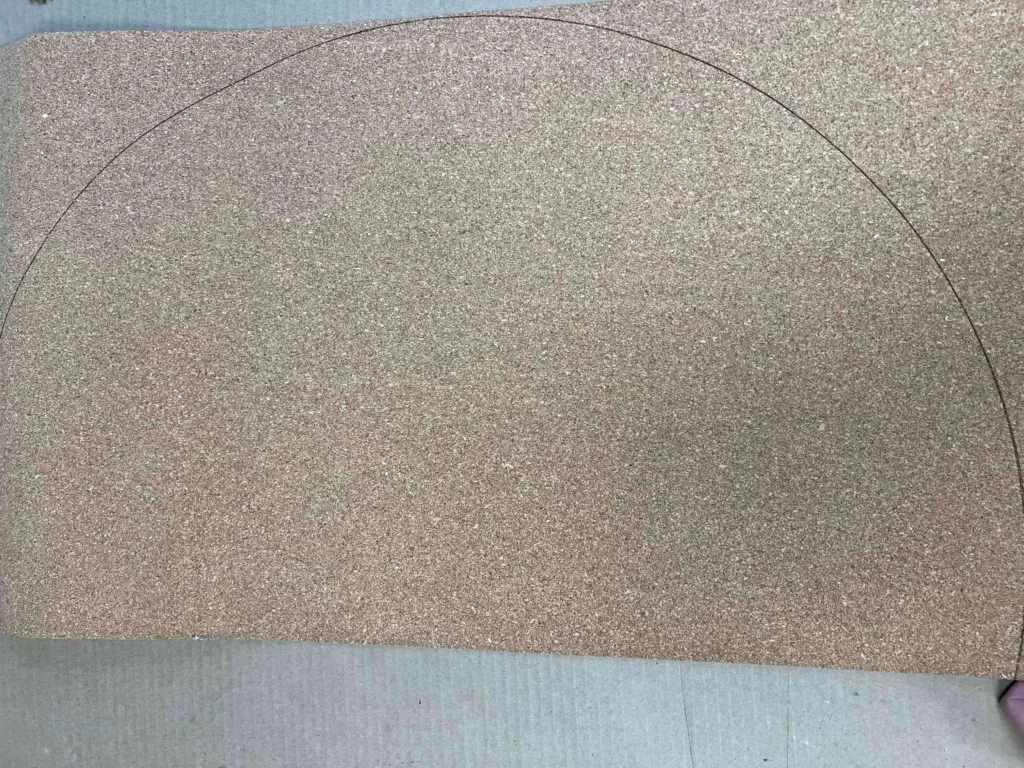
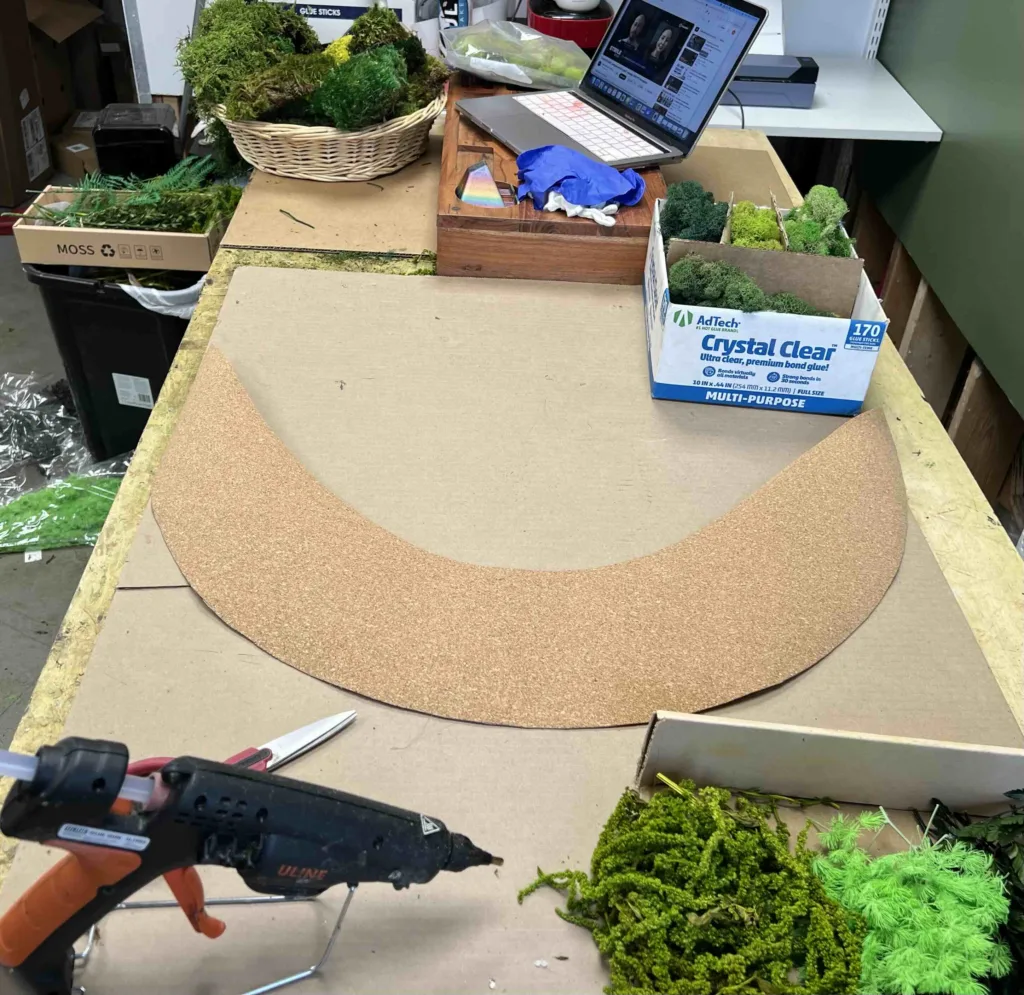
Step 2: Measure the Mirror and Prepare the Self-Adhesive Cork
Now that you have your mirror dimensions, measure the exact area where you want the moss panel to be placed. Take your self-adhesive cork strip and position it on the side of the mirror where you plan to attach the moss. This cork will serve as the base for the moss panel. Carefully cut a crescent shape from the cork panel to match your desired design. The crescent shape will provide a unique and organic frame for your moss, allowing it to blend seamlessly with the mirror’s reflection.

Step 3: Attach the Moss and Add Preserved Plants to the Cork Panel
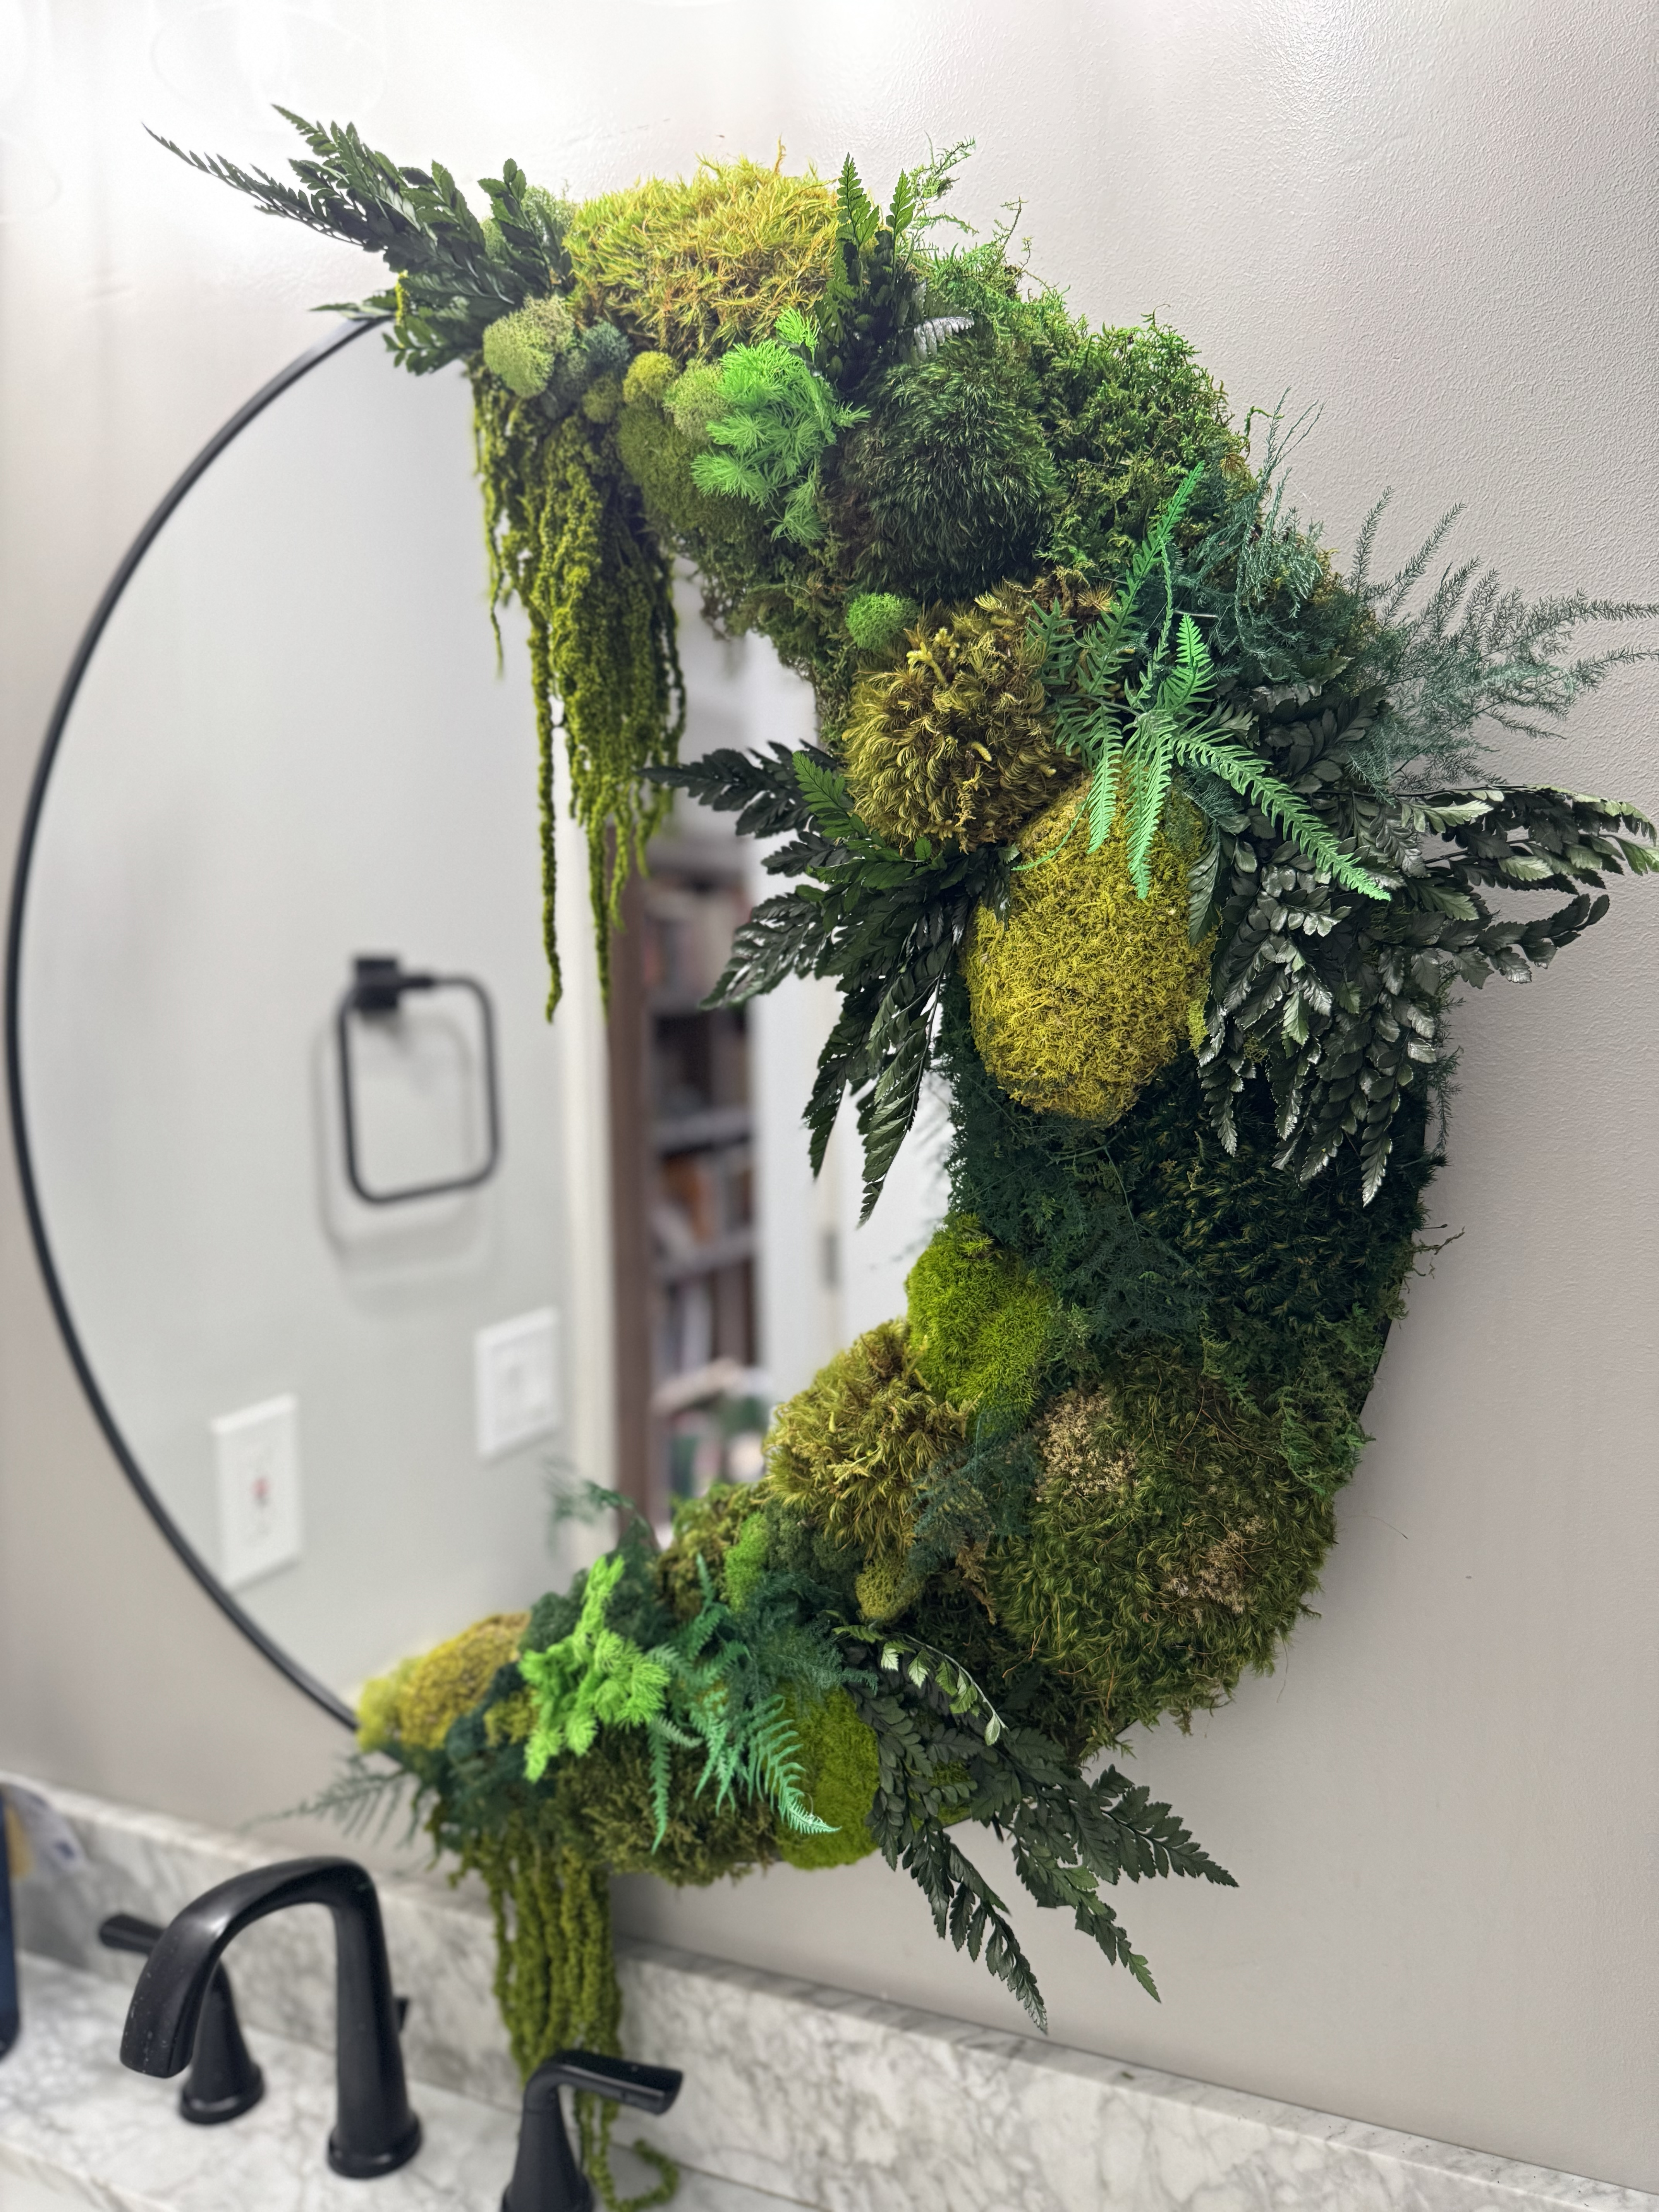
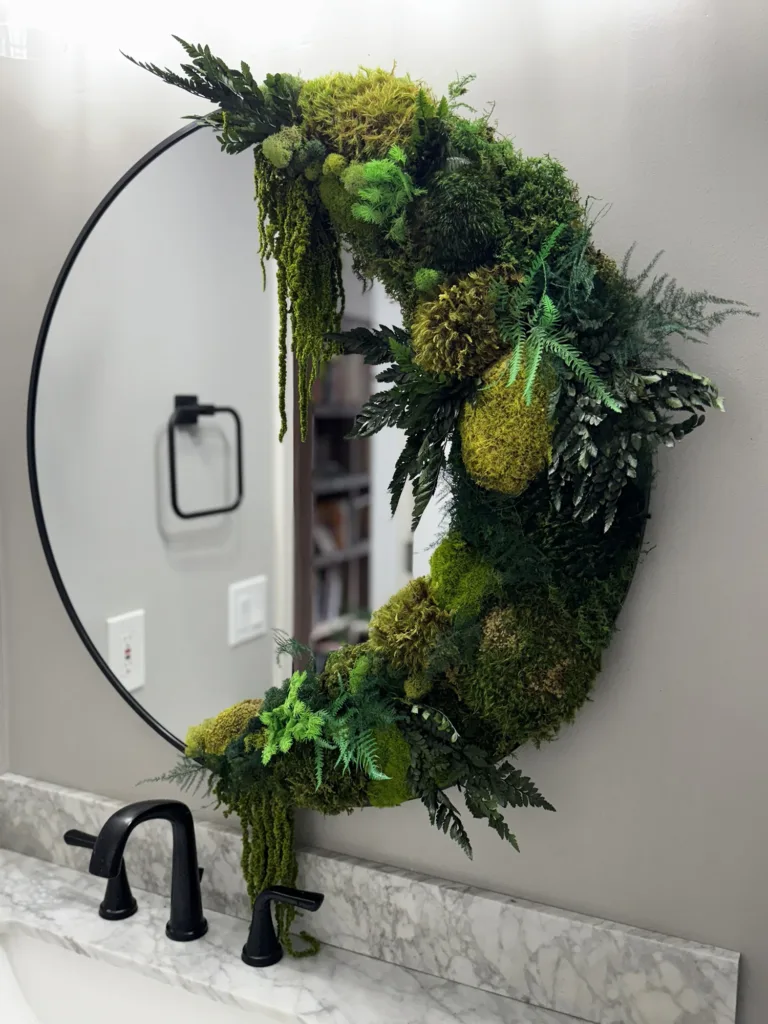
Once your cork panel is prepared, it’s time to bring your moss panel to life! Using a hot glue gun, carefully glue small sections of moss onto the cork, arranging them in your desired style. Whether you want a dense, full coverage or a more sparse, natural look, this step allows for creative freedom. Once the moss is securely in place, finish off your design by adding preserved plants for extra texture and dimension. These plants can be placed around the moss to enhance the overall aesthetic and create a more lush, vibrant look.
Step 4: Final Touch – Stick the Panel on the Mirror and Enjoy!
And just like that, your moss panel is ready! Carefully peel off the backing from the self-adhesive cork and press the moss-covered panel onto the mirror. Make sure it’s positioned exactly where you want it before firmly pressing it into place. Once secured, step back and admire your work! You’ve transformed your bathroom mirror into a stunning, nature-inspired feature. Enjoy the refreshing touch of greenery every time you look into the mirror!
Finally, if you would like to watch a video about this step-by-step tutorial, please click the link below and enjoy! Let me know in the comments if you have any questions or if I can be of any assistance while you work on your new project or any other moss project.
If you prefer to buy an already-made mirror panel or any other moss creation for your home/office, please feel free to browse through my website and use code MOSS15 to get 15%off and free shipping.
Click here if you would like to buy a custom bathroom mirror moss panel!
If you would like to check out another similar product for your bathroom, a moss wall for around the mirror, please click here. To place a custom order for this product, please click here.
Thanks for your interest!